How to model AAC with our minimally speaking students?

|
modelling AAC

How should we start? Should we use prompts? What kind of prompts? hand-over-hand or just pointing? Should we wait, and, if so, how long? Introducing an alternative communication system (AAC) to our child is for many of us a confusing and sometimes scary prospect, but it needn’t be! Let me reassure you and share some tricks of my practice in this area.

Once we have decided to try for a picture based communication system, I usually start with a paper-based single page with between 48–88 core-words. I choose the number of words depending on where the child is developmentally and also verbally.

If a child does have a small handful of words already, I might start with the 88-cell board below. If, on the other hand, my student is completely non-speaking and still quite little then I might go for the 48-cell below here or I might have even less cells to start with. Again, sometimes I start with an electronic device in my clinic just to trial and introduce the idea and to see if, or how, a student responds. 

Below are some samples: a 49-cell board which I made for a child in a nursery setting

Below a Saltillo WordPower board that can be downloaded from the Saltillo website:

Example of a slightly more advanced board, again from the Saltillo Website

And here below one example of a board I made for a specific activity for a child who loves water and sand play:

It is perfectly possible to be very flexible and create a suitable board for any student, starting with as few as 2–5 cells and working up to over a 100 (very small ones) on a sheet of A4 or A3 paper.

So once we have a good board for our child, what now? How do we start introducing this into our daily life?

We can start by showing/pointing to the word GO within a play activity. For example:

  • a car run,
  • or a marble run,
  • or a spinner activity,
  • a wind-up toy,
  • anything that can be stopped and started easily.

How to start?

I will talk us through each of the steps using the example for the word ‘GO’.

First phase

The first phase is a TEACHING/ LEARNING PHASE. In this phase we do not expect our student to do anything, to copy us or to point to the board. If they do that it is of course a huge bonus and we will celebrate it.

Our job is to simply MODEL/SHOW/GIVE EXAMPLES of how we can use the board, by steadily and regularly pointing to the chosen word or words. We do so across the day and across settings:

  • play
  • meal time
  • getting dressed/undressed
  • bath time
  • going to the car/shops
  • etc

Once we can be sure that our student has been submerged and SOAKED in seeing the coreboard being used, say after some 3–4 weeks of using it consistently…

Second phase

We can begin to move into the second phase which is the PRACTICE PHASE. By now the student has seen the boards and he or she has seen the word GO (as a example) modelled many times.

Now we can start to see if we can tempt our student into trying this out for themselves.

What sort of TEMPTING are we talking about? Take a look at the Prompt Hierarchy below, which shows us what to do to get our student to be independently communicating as soon as possible. 

The PROMPT HIERARCHY: what sort of prompting should we do, should we expect something from our student or how should we view this stage?

  1.  TEMPT AND PAUSE

I have the AAC near to the toy and each time the child starts another round of the activity I say clearly ‘GO’ and I point to the picture as do so. I then pause and wait to see what happens. NOTHING? Then…

  1. USE SIGNS AND BODY LANGUAGE

Next time the child starts another round I might be very animated and do a Makaton sign for GO as I say ‘GO’ and I make a very over point to the picture again. Then I wait. STILL NOTHING? OK then…

  1. OPEN-ENDED QUESTION

Now I might say ‘GO’ and follow with: ‘OOH I WONDER IF THERE IS A PICTURE TO POINT TO…’

‘OH LOOK HERE IS GO!’ I then point to GO.

 STILL NO RESPONSE?

  1. ASK FOR A RESPONSE

I might say ‘GO’ followed by ‘LOOK! LET’S POINT TO GO HERE ON THE PICTURE.’

STILL NO RESPONSE? 

  1.  PHYSICAL TOUCH

Next time I say ‘GO’ I will try and take the student’s hand, help isolate their finger and help him or her to point to the actual picture.

REMEMBER: Prompting serves a very important function in scaffolding learning for students BUT if we are constantly prompting kids, then we are teaching them to only communicate when someone tells them to. We want our student to become as independent in speaking and using words as possible.

So once I have done Physical Prompting I will try and phase back down to number 1 where all I need to do is point to the picture or look at the board with the aim that the student will then point to the picture.

Take away points:

  • Keep the learning phase pressure-free and model without expecting our student to jump in. In other words, let’s model first without expectation. Later we can have a little bit of expectation.
  • After they’ve been exposed to and have been ‘soaked’ in plenty of AAC input, then, YES, we can create an opportunity to help them say or point to the word on their own.
  • We can model BOTH with and without expectation.
  • Only after LOTS of exposure, use the least to most prompting hierarchy and start creating opportunities for a student to become an independent communicator.

Do get in touch if you have any questions or comments or if you would like some practical help.

I am always pleased to hear from you.


Find a speech and language therapist for your child in London. Are you concerned about your child’s speech, feeding or communication skills and don’t know where to turn? Please contact me and we can discuss how I can help you or visit my services page.

0

Similar Posts

  • Speech sound disorders

    Kids Speech Therapist London
    Speech Sound Disorders

    Treatment Approaches – A Typical Session

    There are various great ways to treat speech sound disorders and I use all the approaches available selectively; I decide what works with each individual child and I also vary the approach depending on the child’s frame of mind at any given time during my session.

    Some of the approaches are more “drill-based” and require a child to be able to pay attention and really participate actively in the therapy, and this is what I am showing you today with this video clip.

    My little student here has been working with me for some time and from only saying a handful of words which were not very easy to understand he has come a long way. He does have some features of Verbal Dyspraxia which I shall briefly outline here:

    • Making sounds in general is a struggle, especially when asked to copy certain sounds, example: ‘can you say: a ee ou oo?”
    • Repeating sound sequences or words sequences is hard, for example: “say p-t-k in sequence” or “say fish chips fish chips fish chips
    • When saying the same word again and again, different mistakes can be heard
    • Intonation difficulties: speech sounds monotonous
    • Vocabulary is very limited

    Some therapy approaches are more play based, for example the Core Word method: here we pick a few words at a time which are very significant to the child and therefore highly motivating to try and say. These could be characters of Pokemon or Minecraft for example, or simple words like “GO!”

    When you watch the video you will see that I use a lot of visual prompting, such as showing him where the tongue is moving to or from. I do this with my index finger and this approach is called Tactile Cueing or “Cued Articulation”. Part of the approach is to give a visual prompt and then reduce the prompt as the learner is more able to produce the correct sounds. Once he can produce the sound on its own, we quickly move to the sound within a word.

    I do mix and match my approaches and in fact here I am drilling but I also use the Core Word which for him (YELLOW) — it’s his favourite colour and I happen to have quite a few good games where a YELLOW something or other can be asked for….. WHO KNEW!? 🙂


    Find a speech and language therapist for your child in London. Are you concerned about your child’s speech, feeding or communication skills and don’t know where to turn? Please contact me and we can discuss how I can help you or visit my services page.

  • ·

    Baby-Led Weaning: A Speech and Language Therapist’s Take

    Let’s face it, introducing solids is a rollercoaster for parents. You’re bombarded with advice (solicited and otherwise) on purees, spoon-feeding, and the much-discussed ‘baby-led weaning’ (BLW). As a speech-language/feeding therapist I see the world through the lens of communication and development, as well as safe munching and swallowing. BLW can be a fantastic option for many little foodies. But is it right for yours? Let’s take a dive into the messy, hilarious world of toddler feeding.

    BLW in a nutshell

    Your baby, perched in their highchair, eyes wide with excitement and curiosity reaches out for a platter of food. He/She grabs a fat avocado slice, and curiously explore it with his/her lips, gums and tongue. He/She spits some of it out, mashes bits of it into his/her hair, there was a tiny swallow and the rest is smeared onto the high chair tray. Now he/she grabs a bit of the banana and rinse and repeat as before, except this one he/she keeps in his/her mouth for bit longer and takes a tiny bit more before the rest gets deposited into his/her bib.

    This, in a nutshell, is BLW! It’s all about letting your little one take the lead in exploring new foods, textures, and tastes. No spoon-feeding, just pure, messy, self-directed feeding fun.

    The pros of letting your little one loose on solids:

    • Motor Skills: BLW is a sensory party for developing motor skills. Picking up that slippery banana or gumming a chewy piece of toast strengthens those tiny hands and mouth muscles. These are the very skills they’ll need for future talking and chewing.
    • Texture Time: BLW exposes your baby to a variety of textures right from the start. Think soft, steamed broccoli florets or smooth, banana half-slices. This sensory exploration helps them develop an understanding of different textures in the world, which can translate to better oral motor skills needed for speech development.
    • Independence: BLW fosters a sense of self-feeding independence. Your toddler learns to control how much he/she eats and the pace of his/her meal. This can lead to better self-regulation later on, not just with food, but in other areas of his/her development too.
    • A wider variety of flavours: BLW encourages exposure to a wider variety of tastes and smells. Let your baby discover the sweetness of roasted sweet potato or the tang of mashed avocado! This early exploration can lead to less picky eating down the road.

    There are some valid concerns:

    • Gagging vs. Choking: One of the biggest concerns parents have about BLW is choking. However, gagging is a natural reflex that helps babies learn to move food safely around their mouths. Choking is much rarer, and with proper food selection and supervision, the risk is very low. The con here really is parental anxiety more than anything else and if you can overcome this then a bit of gagging is just fine and part of the process. Choking, again most children do choke occasionally a bit! Of course, close supervision and common sense is very important here.
    • It’s ever so messy!: Be prepared for mashed banana on the highchair tray, rogue peas flung across the room, and a general sense of chaos. But then again, this is an important part of the learning process! I would encourage you to embrace the mess (within reason and your personal tolerance level) and focus on the fun of exploration.
    • Nutritional Concerns: Some parents worry that babies won’t get enough nutrients with BLW. While it might take a while for them to master the art of self-feeding, a healthy child’s body is pretty good at self-regulating. Offer a variety of healthy options, and he/she will eventually get the hang of it.

    BLW: Is it right for your Little One?

    BLW isn’t a one-size-fits-all approach. Here are some things to consider:

    • Developmental Milestones: Babies should be able to sit up with good head control and show an interest in food before starting BLW.
    • General good health and absence of food intolerances, allergies, or other significant health issues which might dictatea more controlled feeding regime.
    • Gag Reflex: A strong gag reflex is a good sign. It shows your baby’s natural ability to move food safely around their mouth. If, however, your baby’s gag is overly sensitive and causes frequent bouts of vomiting please consult your health care professional for an assessment (GP, Paediatrician, Dietician, Speech and Language – Feeding Therapist).
    • Your Comfort Level: BLW requires a relaxed and patient approach. If you’re feeling stressed about the mess or potential choking hazards, it might not be the right fit for you.

    A final mouthful:

    BLW can be a fantastic way to introduce your baby to solids. It promotes exploration, independence, and a love for food. Remember, there’s no pressure to go all-in on BLW. You can always combine it with spoon-feeding or purees to find an approach that works for your family and your child. The most important thing is to create a positive and relaxed mealtime environment where your little one can explore the wonderful world of food at their own pace.

    P.S. As an SLT, I always recommend chatting with your health care professional. This way you can address any concerns you might have and ensure your baby is developmentally and physically on track for this exciting new chapter.

    Don’t hesitate to contact me!

    Sonja McGeachie

    Early Intervention Speech and Language Therapist

    Feeding and Dysphagia (Swallowing) Specialist The London Speech and Feeding Practice

    The London Speech and Feeding Practice


    Find a speech and language therapist for your child in London. Are you concerned about your child’s speech, feeding or communication skills and don’t know where to turn? Please contact me and we can discuss how I can help you or visit my services page.

    1
  • ·

    Explore how Intensive Interaction develops Autistic children’s communication

    Intensive Interaction is an approach that I might suggest for your child. Here is an overview of this approach to increase your knowledge. There are a range of approaches that overlap and having trained in them all I use them all interchangeably to tailor to each child individually. This approach is particularly good for children who work mostly to their own agenda and find it hard to engage with others.

    So, what is Intensive Interaction?

    According to its founder, Hewett (1980), the approach “involves mirroring a person’s actions, sounds and facial expressions.” This allows your child to recognise and form communication between themselves and another, in a fun, play-based setting. Attention and listening are the fundamentals to speech and language development. By using the Intensive Interaction approach, we can increase the time your child can attend for and with another person. We are working towards a child enjoying another person’s presence. We are hoping to make gains with playing together with a child, taking turns and achieving reciprocity. That is the platform which we need to start with to build communication, language, words and perhaps even speech.

    There are many aspects that this approach supports:

    • such as using facial expressions
    • being in the presence of other people
    • having a shared space
    • attending to others
    • recognising and using non-verbal behaviours (e.g., gestures)
    • making sounds/noises (vocalisations) that have meaning
    • and eye contact. Although, we must be careful when suggesting ‘improving’ the use of eye contact. For some individuals making eye contact can be physically painful. So be aware that we are not making our children ‘look’ we are encouraging their natural behaviour.

    Who benefits from Intensive Interaction?

    Children with more complex communication and learning delay can benefit from the Intensive Interaction approach. Each session can be adapted to the needs of the individual and the sessions can be designed to use the whole or part of the approach. It is especially useful for children who are finding it hard to engage in any way socially with another person. Autistic children who tend to work to their own agenda often benefit from this approach.

    How is Intensive Interaction implemented?

    You need to have an environment that your child is comfortable in, and to be able to come down to their level so that you can see each other. This is why I often visit children in their own homes to ensure that they are comfortable and that they can withdraw for periods of time if they need to as well.

    Ensure your child knows you’re there and you are 100% present. This is very important. I would recommend that you put your phone away for some 10 minutes or so and give your undivided attention to your child for that period of time.

    Waiting

    Waiting is very important: we need to give your child time to process what is happening around them. After waiting for a response, you might want to start copying any gestures they use, any facial expressions they make, or perhaps imitate any sounds. You’ll want to continue with this for a few minutes to see if the communication between you and your child changes. Remember always take the cues from your child; if they communicate a message with you, respond. It might be that they are ready to finish and that they’ve shown this by walking away or signing.

    Giving your child a way to respond is vital. We can use visuals to support their communication. We can create ‘yes’ and ‘no’ symbols so they can use them in a functional way.

    A top tip in these sessions is to use mirrors, so that your child can see and begin to recognise their own facial expressions.

    There are other programmes that overlap with Intensive Interaction such as Hanen with following your child’s lead and the Gina Davies Curiosity Programme.

    Now you know a bit about Intensive Interaction, why not book a call to discuss how we can support your Autistic child’s communication using this evidence-based approach.


    Find a speech and language therapist for your child in London. Are you concerned about your child’s speech, feeding or communication skills and don’t know where to turn? Please contact me and we can discuss how I can help you or visit my services page.
    0
  • · · ·

    The joy of container play: Exploring play development and understanding of how things work

    Have you heard the term ‘Container play’? I use this very often with children in my sessions as it is so versatile and an enjoyable activity that can be done in parallel with a child or together. Container play is a powerful tool for fostering development in young children, especially those with developmental delays. This seemingly mundane activity provides a rich environment for sensory exploration, motor skill development, and cognitive growth.

    What is container play?

    Container play involves children interacting with various containers—boxes, buckets, bowls, cups, various bags, etc.—and filling, emptying, and transferring objects within and between them. Objects can include literally anything: small beads, bead chains, table tennis balls, wooden pegs, dinosaurs or any other little person toy, blocks of varying sizes, sand, water, or any other safe material. Larger containers obviously take larger items: socks, stuffed animals, bigger balls, bigger blocks etc really the choices are endless.

    Benefits for children with developmental delays:

    Sensory exploration:

    • Touch: Children explore different textures and temperatures of containers and objects.
    • Sight: They observe how objects look inside and outside the containers, how light reflects off them, and how colours change.
    • Sound: They listen to the sounds of objects clinking, rattling, and splashing.
    • Proprioception: Filling and emptying containers helps develop body awareness and spatial awareness.

    For neurodivergent children who might have sensory regulation difficulties, consider the following adaptions to accommodate your child’s sensory needs:

    • Over-stimulation: For children who are easily overstimulated, start with simple setups using a limited number of containers and objects. Gradually increase the complexity as they tolerate it.
    • Under-stimulation: For children who seek sensory input, provide a variety of textures and materials, such as sand, water, slime, or beans.
    • Temperature: Offer a variety of temperature options. Some children may enjoy warm water or cool sand.
    • Lighting: Adjust the lighting to create a calming or stimulating environment.
    • Focus on one sense at a time: Initially, focus on one sensory aspect, such as the feel of sand or the sound of water.
    • Weighted containers: Use heavy containers filled with rice or beans to provide deep pressure input.
    • Fidget toys: Incorporate fidget toys into the activity to provide sensory input and help with self-regulation.
    • Tactile exploration: Encourage exploration of different textures using objects with varying surfaces.

    Fine motor skill development:

    • Hand-eye coordination: Scooping, pouring, and transferring objects require precise hand-eye coordination.
    • Pincer grasp: Picking up small objects helps develop fine motor skills like the pincer grasp.
    • Strength and dexterity: Manipulating containers and objects strengthens hand muscles and improves dexterity. Opening and closing containers can be a huge area of interest; how does the top screw back on, or off?

    Cognitive development:

    • Cause and effect: Children learn that their actions (e.g., pouring water or sand) have consequences (e.g., the water spills).
    • Spatial awareness: They develop an understanding of concepts like inside, outside, full, empty, and over/under; also how big is the vessel and how much goes in before it’s full or spills over. How small is the vessel opening and what do I need to do to get the beads into the container.
    • Problem-solving: Children learn to solve problems, such as how to get an object out of a narrow container or how to transfer water without spilling.

    Social and emotional development:

    • Communication: Container play can encourage communication as children interact with others, sharing toys and commenting on their actions. Asking for help to open and close a container is often a great opportunity to practise ‘help me’ or ‘open it’
    • Turn-taking: Sharing containers and materials helps children learn to take turns and cooperate.
    • Sensory regulation: For children with sensory sensitivities, container play can be a calming and self-regulating activity.

    Tips for engaging children in container play:

    • Create a safe and inviting environment. A shower curtain on the floor makes things easier for tidy up afterwards. And it allows for spillages.
    • Provide a variety of containers: Use different sizes, shapes, and materials. Use containers that are visually interesting and pleasing, perhaps a festive biscuit tin, or a tin that looks like train engine. Use see-through containers at first which make the filling and emptying more obvious. This is important for children who have no previous experience with this type of play and need to ‘warm up’ to it. Once a child loves and is used to container play you can go wild with all types of containers.
    • Offer a variety of objects: Include balls, blocks, sand, water, and other age-appropriate materials.
    • Join in the fun! Start off the process, show your child what the joy of the activity is for yourself, how fun it is to fill and empty containers, provide enough containers for your child to start playing alongside you, and comment on their actions.
    • Follow your child’s lead: Allow them to explore and experiment at their own pace.
    • Adapt activities: Adjust the level of challenge based on your child’s abilities and interests.

    Container play is a simple yet powerful tool that can support the overall development of young children, especially those with developmental delays. By providing a rich and engaging sensory experience, container play can help children build essential skills in motor, cognitive, social, and emotional domains.

    If you have any questions or would like to have more in-depths demonstration of this or other play styles for your child please contact me.

    I look forward to hearing from you.

    Sonja McGeachie

    Early Intervention Speech and Language Therapist

    Feeding and Dysphagia (Swallowing) Specialist The London Speech and Feeding Practice

    The London Speech and Feeding Practice


    Find a speech and language therapist for your child in London. Are you concerned about your child’s speech, feeding or communication skills and don’t know where to turn? Please contact me and we can discuss how I can help you or visit my services page.
    1
  • · · ·

    Seeing sounds: How visual gestures boost speech sound learning

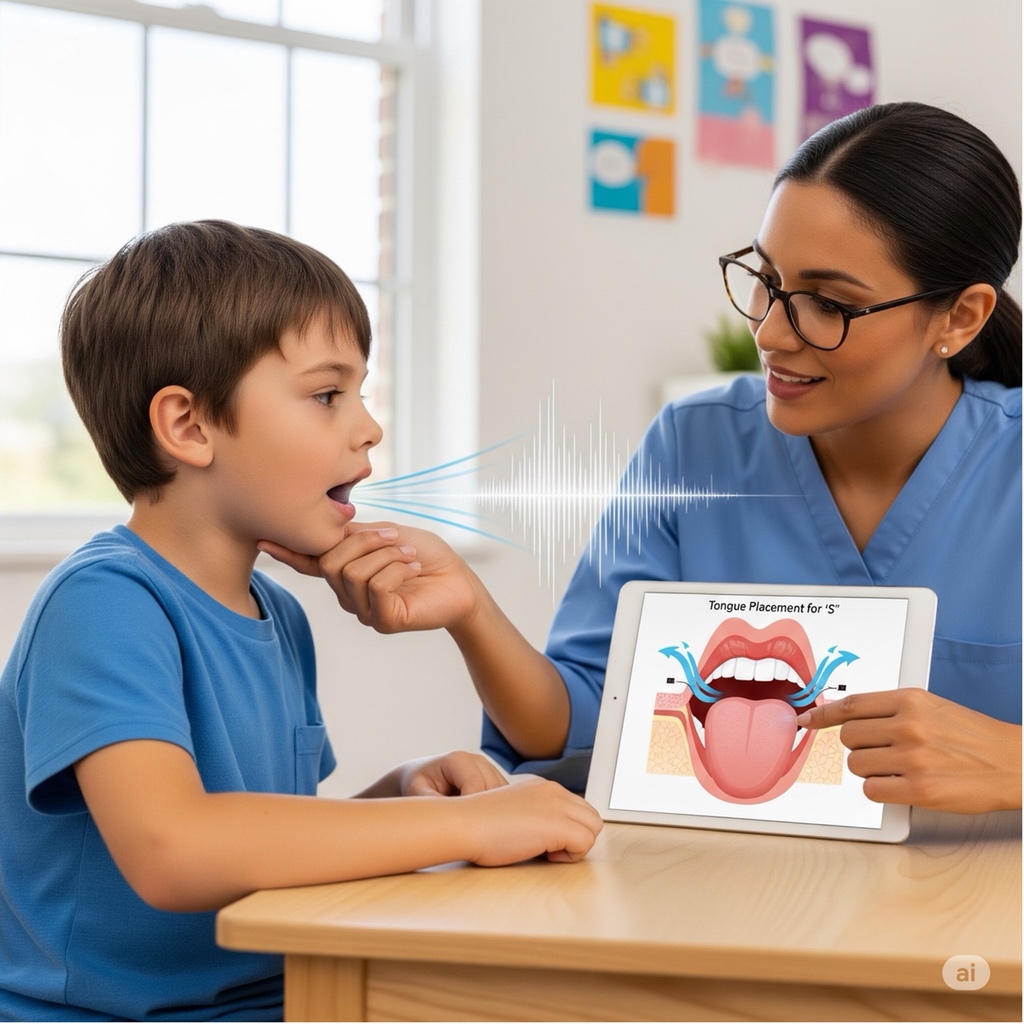
    Learning to produce new speech sounds can be a complex process for young children, especially those facing challenges with speech sound disorders or motor planning difficulties. It’s not just about knowing what a sound ‘should’ sound like; it’s about figuring out where to put your tongue, how to shape your lips, and how much air to push out. This is where the power of visual gestures comes in – literally helping children see how to make sounds.

    As speech and language therapists, we frequently use visual cues and hand gestures to teach articulation. These techniques are incredibly effective, particularly when a child is struggling with the motor planning aspect of speech production.

    In the video clip above you see me teaching

    • the /SH/ sound: the hand makes a C-shape and moves forward showing both how the lips are positioned and the air flowing forward
    • the /S/ sound: the index finger shows a snake like movement going forward- also showing the air flow again
    • the /W/ sound: my right hand moves forward and fingers splay out showing that the lips open up at the end of the sound
    • the /K/ sound: my finger points to the back of my throat where the tongue needs to raise.

    An overview of motor planning for speech – what do we mean by that?

    Think about learning to ride a bike or play a musical instrument. You don’t just know how to do it instantly. You have to plan the movements, practise them, and make adjustments. Speaking is similar! Our brains must:

    1. Plan the sequence of movements needed for each sound and word (e.g., /B/ requires lips together, then release, while /T/ requires the tongue tip behind the top teeth, then release).
    2. Execute those plans rapidly and precisely.

    For some children, especially those with conditions like Childhood Apraxia of Speech (CAS) or other severe articulation disorders, this motor planning process is disrupted. They know what they want to say, but their brain struggles to send the correct, consistent messages to their articulators (lips, tongue, jaw, velum). This can make speech sound learning incredibly frustrating.

    Why use visual gestures?

    Visual gestures provide an additional, powerful sensory input that can help bridge the gap between knowing a sound and producing it. Here’s how and why they are so beneficial:

    1.      Providing a visual map:

    • How it helps: Many speech sounds are ‘hidden’ inside the mouth. It’s hard for a child to see where their tongue needs to go for a /K/ sound (back of the tongue to the roof of the mouth) or a /T/ sound (tongue tip behind teeth). A simple hand gesture can visually represent this mouth movement. For example, a hand gesture for /K/ might involve sweeping the hand back towards the throat, while for /T/, it might be a tap on the chin.
    • Why it works: Children are highly visual learners. Seeing a physical representation of an abstract mouth movement gives them a concrete ‘map’ to follow, making the process less mysterious and more manageable.

    2.      Enhancing motor planning and memory:

    • How it helps: When a child simultaneously moves their hand (the visual gesture) and attempts to make the sound, they are engaging multiple sensory systems (visual, tactile, proprioceptive – body awareness). This multi-sensory input strengthens the neural pathways associated with that speech sound.
    • Why it works: This multi-modal learning helps to solidify the motor plan for the sound in the brain. It’s like having more ‘hooks’ to hang the information on, making the sound easier to recall and produce consistently. The gesture becomes a built-in reminder.

    3.      Reducing cognitive load:

    • How it helps: Instead of just hearing the sound and trying to figure out the complex motor sequence, the child has a visual cue to guide them. This reduces the mental effort required to decode the sound production.
    • Why it works: When cognitive load is lower, the child can focus more effectively on the specific motor execution of the sound, leading to faster progress and less frustration.

    4.      Increasing engagement and success:

    • How it helps: Gestures can make therapy more interactive and fun! When a child successfully produces a sound with the help of a gesture, it’s a tangible victory.
    • Why it works: Success is a powerful motivator. When children experience success, they are more likely to stay engaged, participate actively, and feel more confident in their ability to learn new sounds.

    5.      Supporting self-correction:

    • How it helps: Once a child learns the gesture associated with a sound, he or she can use it as a self-monitoring tool. If he or she makes an error, he or she can use the gesture to remind himself or herself of the correct mouth position or movement.
    • Why it works: This promotes independent learning and reduces reliance on constant adult prompting.

    Conclusion

    The journey of speech development can be challenging, but visual gestures offer a powerful and effective tool for teaching new sounds, especially when motor planning is a factor. By providing a clear visual map, strengthening motor memory, reducing cognitive load, and fostering engagement, these gestures pave the way for clearer communication and greater confidence. If your child is struggling with speech sounds, consider talking to a Speech and Language Therapist to get guidance on how visual gestures might be incorporated into the therapy plan. Because sometimes, seeing truly is believing (and speaking!).

    Sonja McGeachie

    Highly Specialist Speech and Language Therapist

    Owner of The London Speech and Feeding Practice.


    Health Professions Council registered
    Royal College of Speech & Language Therapists Member
    Member of ASLTIP

    Find a speech and language therapist for your child in London. Are you concerned about your child’s speech, feeding or communication skills and don’t know where to turn? Please contact me and we can discuss how I can help you or visit my services page.

    1
  • ·

    Correcting a lisp

    Correcting A Lisp

    This is a surprisingly common speech error and it can be corrected really well in my experience. I have helped lots of children of all ages learn how to control their tongue movements and produce clear, sharp /S/ sounds and good /SH/ sounds.

    Initial consideration

    There are some factors which need to be considered before we can dive into therapy proper and these are they, in a nutshell:

    1. The student is not currently displaying negative oral habits such as thumb sucking or excessive sucking on clothing. This is because thumb sucking exerts pressure on the teeth and therefore can, over time, push teeth out of their natural order/position.
    2. The student does not have a restricted lingual frenulum or tongue tie which can cause at times restricted movements of the tongue (pending on how tight the frenulum is attaching the tongue to the base of the oral cavity); equally a labial frenulum or lip-tie can restrict lip movement and therefore physically restrict good speech sound production.
    3. The student does not have enlarged tonsils as they can sometimes push a tongue forward and also cause open mouth posture and open mouth breathing.
    4. The student’s motivation to change their speech pattern is high. (this is an important factor though with younger students I can get round this with a lot of fun games and good parental involvement!)

    When I do an Oral Assessment of my student these are the first factors I want to look at and consider. Often I will refer to other agencies such as Orthodontists, dentists or ENT specialists to advise and help with some of these factors before we can get going. However, there are strategies that we can work on almost straight away.

    Most of my Lisp students present with an open mouth posture: that is where the student has their mouth always slightly open for breathing. Over time the tongue starts to fall forward and rests on the front teeth or the bottom lip instead of finding a comfortable resting place either at the alveolar ridge (the bumpy spot behind the upper front teeth) or, alternatively, resting at the bottom of the mouth behind the lower front teeth.

    Another common problem is that the tongue is not moving independently from the jaw and so is reluctant to pull back or lift up inside the mouth as the tongue is guided in movement by the jaw.

    Combine those two factors and your tongue is not pulling back, or lifting up or doing very much at all without the jaw moving as well. This makes for unclear speech sounds, especially all the sounds we make at the front with our tongue or with our lips: /B/ /P/ /L/ /N/ and of course /S/ and /SH/ are particularly hard to make. We often also struggle with the /Y/ sound so ‘LELLOW’ instead of ‘yellow’.

    Do not fear!

    But no fear, these problems can be treated over time for sure! We often start with lip, tongue, and jaw exercises that help to move the tongue independently from the Jaw, our student learns that the tongue is a muscle and can be trained to do amazing acrobatic things in the mouth! WOW! It can actually pull back, lift up, and come down again all on its own!

    We work on breathing, holding our breath for a bit then pushing it out and then holding it again.

    And when it comes to the actual /S/ sound I often try and go a NEW route bypassing the Snake-Sound route if that is what had previously been tried and failed so that we can create completely new sound patterns in our brain and think about our sounds in a completely new way.

    We then work on producing the sound /S/ on its own for a bit, at the end of words, then on either side of complimentary sounds, for instance : ‘EASY” – the sound patterns here are EEE-S–EE : the /EEE/ sound is complimentary to the /S/ sound as the tongue is at the right hight for the /S/ already once you have it in place for /EEE/ -……see?! EASY!

    And gradually we work towards saying the /S/ sound clearly at the front of short words, then phrases and then sentences.

    The process takes some time and it depends on how ready the student is. This varies of course hugely so I can never promise the exact number of sessions we will take to get that Lisp fixed. A lot depends on home practice in between sessions, and this is of course crucial to all therapy! Every day 15-20 mins practice is a good average time to aim for and when this is done it shortens the therapy block drastically.

    I always give plenty of home work so there is never a chance of it getting boring or there being “nothing to do”!

    Do contact me. I really enjoy working with this type of student and get a great kick out of FIXING THAT LISP!


    Find a speech and language therapist for your child in London. Are you concerned about your child’s speech, feeding or communication skills and don’t know where to turn? Please contact me and we can discuss how I can help you or visit my services page.