Tongue-Tie: A complex issue requiring careful assessment

Tongue-tie, or ankyloglossia, is a condition where the lingual frenulum, the thin piece of tissue that connects the underside of the tongue to the floor of the mouth, is too short or tight. Tongue-tie is quite common in babies and is often not detected after birth. Tongue-tie can lead to a difficult start with breast feeding as it makes it very difficult for the baby to latch effectively.

In my clinical experience as a feeding therapist, I have seen many babies who were not able to latch well due to the frenulum being tight. In many cases an experienced feeding speech therapist/lactation consultant can really make a difference and help a new mum to latch the baby even though the tongue is tethered to the floor of the baby’s mouth. In some cases the frenulum can be divided and once this has been done, in some cases, feeding improves immediately or soon after the division. But this is not always the case. I have seen several babies who have had as many as four tongue-tie divisions and feeding was still difficult.

It is important to say that while tongue-tie can sometimes impact speech and feeding, it’s important to note that it’s not always the root cause of these difficulties. In recent years, there has been a surge of interest in tongue-tie division surgeries, with some cases being unnecessary. It’s crucial to understand the complexities of tongue-tie and the role of speech therapy in addressing related challenges.

The impact of tongue-tie on speech and feeding

When tongue-tie is severe, it can interfere with the tongue’s ability to move freely, affecting speech production and swallowing. Some common speech and feeding difficulties associated with tongue-tie include:

  • Feeding difficulties: Challenges with sucking, chewing, and swallowing.
  • Drooling: Excessive drooling due to difficulty controlling saliva.
  • Speech problems: Difficulty producing certain sounds, such as /l/, /r/, /t/, /s/ and /d/.

The importance of comprehensive assessment

Before considering any surgical intervention for tongue-tie, it’s essential to undergo a thorough evaluation by a qualified speech-language therapist (SLT). An SLT can assess the severity of the tongue-tie, its impact on speech and feeding, and determine if surgery is necessary.

  • Functional assessment: The SLT will assess the tongue’s range of motion, its impact on speech sounds, and the child’s overall oral motor skills.
  • Feeding evaluation: The SLT will observe the child’s feeding patterns and identify any difficulties related to tongue-tie.
  • Differential diagnosis: The SLT will rule out other potential causes of speech and feeding difficulties, such as apraxia of speech, dysarthria, or sensory processing disorders.

The role of speech therapy

Even in cases where tongue-tie is present, speech therapy can often be highly effective in addressing speech and feeding difficulties. Here’s how speech therapy can help:

  • Articulation therapy: Targeting specific speech sounds that may be affected by tongue-tie.
  • Childhood Apraxia of Speech (CAS): if the diagnosis by the SLT has shown that in fact the child has motor planning difficulties then there are very specific and effective treatment programmes that help with this and can make a real difference over time.
  • Feeding therapy: Strategies to improve swallowing, chewing, and oral-motor skills.
  • Sensory integration: Addressing underlying sensory processing issues that may contribute to feeding difficulties.

London Speech and Feeding Case Study: The importance of comprehensive assessment

One of my clients was initially diagnosed with tongue-tie and recommended for surgery at the age of eight years old. His speech had been perceived by parents and teachers as ‘mumbled and unclear’.

However, after a thorough evaluation, I was able to determine that the child’s primary issue was apraxia of speech, a neurological disorder that affects motor planning for speech. Parents decided to wait with surgery and trust my judgment and we proceeded with weekly intensive speech therapy to address motor planning difficulties around tricky sounds and words. I am delighted to say that the child’s speech has improved significantly, demonstrating the importance of comprehensive assessment and individualised treatment. He is no longer seen as a candidate for an operation, which would have been traumatic for him at his age and, as it turned out, entirely unnecessary.

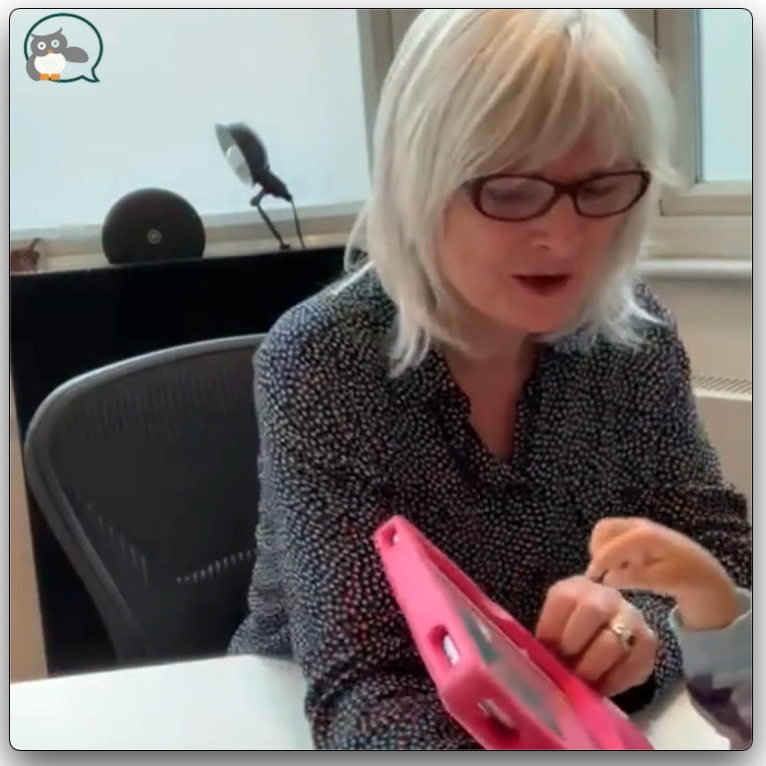
Below is a short video clip of my working on the /l/ sound with this child.

Using the Gingo Puppet from GingoTalk

Conclusion

Tongue-tie is a complex issue that requires careful evaluation and individualised treatment. While surgery may certainly be necessary in some cases, it’s essential to consider the potential benefits and risks. Speech therapy can be a highly effective approach for addressing speech and feeding difficulties associated with tongue-tie, even in cases where surgery is still required. By working with a qualified speech-language therapist, parents can ensure that their child receives the best possible care and support.

Please feel free to contact me.

Sonja McGeachie

Early Intervention Speech and Language Therapist

Feeding and Dysphagia (Swallowing) Specialist The London Speech and Feeding Practice

The London Speech and Feeding Practice


Find a speech and language therapist for your child in London. Are you concerned about your child’s speech, feeding or communication skills and don’t know where to turn? Please contact me and we can discuss how I can help you or visit my services page.

1

Similar Posts

  • · ·

    Conquering the ‘slushy’ /S/: Your guide to treating lateral lisps

    Conquering the ‘slushy’ /S/: Your guide to treating lateral lisps

    As a speech therapist, few things are as rewarding as helping a child find their clear, confident voice. Among the various speech sound disorders, the ‘lateral lisp’ – often described as a ‘slushy’ or ‘wet’ /S/ sound – presents a unique challenge. While it can be tricky to treat, I’m thrilled to share that I’ve had significant success in helping children overcome this particular hurdle.

    What is a lateral lisp?

    Most people are familiar with a frontal lisp, where the tongue protrudes between the front teeth, resulting in a /TH/ sound for an /S/ (e.g., ‘thun’ for ‘sun’). A lateral lisp, however, is different. Instead of the air escaping over the front of the tongue, it escapes over the sides, often giving the /S/ and /Z/ sounds a distinct, muffled, or ‘slushy’ quality. This happens because the tongue is not forming the correct central groove, allowing air to spill out laterally.

    The science behind a perfect /S/ vs. a slushy one

    To understand how to fix a lateral lisp, it’s helpful to understand how a ‘perfect’ /S/ sound is made. Imagine a narrow, focused stream of air. For a clear /S/ sound, your tongue forms a shallow groove down its centre, directing a precise, thin stream of air right down the middle, over the tip of your tongue, and out through a tiny opening between your tongue and the roof of your mouth, just behind your front teeth. This focused airflow creates that crisp, sharp /SSSS/ sound we recognise.

    Now, picture what happens with a lateral lisp. Instead of that neat, central channel, the tongue is often flatter or positioned in a way that allows the air to escape over one or both sides. Think of it like a river overflowing its banks – the air, instead of flowing in a controlled stream, spills out sideways, creating that characteristic ‘slushy’ sound. This lateral airflow is what we need to retrain.

    Why is it tricky to treat?

    Treating a lateral lisp can be challenging for a few reasons:

    • Habitual muscle memory: The way the tongue moves and positions itself for a lateral lisp is deeply ingrained. It’s a motor habit that needs to be unlearned and replaced with a new, more precise movement.
    • Subtle differences: The difference between a lateral lisp and a correct /S/ sound can be quite subtle to perceive, both for the child and sometimes even for parents. This makes it harder for the child to self-monitor and correct.
    • Oral motor control: It requires fine motor control of the tongue muscles to create and maintain that central groove for airflow.

    My success with children aged six years and over

    I’ve found great success in treating lateral lisps, particularly with children aged six years and older. Why this age group? By this age, children typically have:

    • Increased awareness: They are more aware of their speech and often more motivated to make changes. They can better perceive the difference between their ‘slushy’ /S/ and a clear one.
    • Improved cognitive skills: They can understand and follow more complex instructions and strategies.
    • Better self-monitoring: Their ability to listen to themselves and correct their own speech improves significantly.
    • Enhanced oral motor control: Their fine motor skills, including those of the tongue, are more developed, allowing for greater precision.

    My approach focuses on a combination of auditory discrimination, tactile cues, and targeted myofunctional exercises to help children ‘feel’ the correct airflow and tongue placement. We use a variety of engaging activities to make the process fun and effective.

    It is crucial to understand tongue functioning and focusing on correcting improper oral resting posture and muscle function, which are often significant contributors to a lateral lisp. For example, if the tongue rests low and wide in the mouth consistently, or if there’s a tongue thrust during swallowing, these habits can prevent the tongue from achieving the precise, midline placement necessary for a clear /S/ or /Z/ sound. Through targeted exercises I aim to re-educate the oral and facial muscles, promoting correct tongue posture at rest, during swallowing, and, ultimately, during speech production. By strengthening the muscles responsible for tongue lifting and encouraging a more appropriate swallowing pattern we can establish the correct oral motor skills needed to overcome a lateral lisp and achieve clearer articulation.

    The recipe for success: Little and often

    The single most crucial ingredient for success in treating a lateral lisp is daily home practice of all the strategies given. This isn’t about long, arduous sessions; it’s about consistency. Think of it like building a muscle: short, frequent workouts yield better results than sporadic, intense ones.

    My recommended formula is ‘little and often’. This means:

    • Short, focused sessions: Aim for 5-10 minutes of practice, 2-3 times a day. This prevents fatigue and keeps the child engaged.
    • Integrate into daily routines: Practise while waiting for dinner, during a car ride, or before bedtime. Make it a natural part of their day.
    • Positive reinforcement: Celebrate every small success! Encouragement goes a long way in building confidence and motivation.
    • Parental involvement: Parents play a vital role in providing consistent cues and encouragement at home. I equip families with clear, easy-to-follow strategies.

    Overcoming a lateral lisp requires dedication, but with the right guidance and consistent practice, a clear, confident /S/ sound is achievable. If your child is struggling with a ‘slushy’ /S/, please don’t hesitate to reach out. Together, we can achieve success!

    Sonja McGeachie

    Highly Specialist Speech and Language Therapist

    Owner of The London Speech and Feeding Practice.


    Health Professions Council registered
    Royal College of Speech & Language Therapists Member
    Member of ASLTIP

    Find a speech and language therapist for your child in London. Are you concerned about your child’s speech, feeding or communication skills and don’t know where to turn? Please contact me and we can discuss how I can help you or visit my services page.

    1
  • · ·

    Using AAC during play with your child

    Playtime! It’s a magic time for exploration, learning, and connection.

    If your child is struggling to use words with his/her mouth, we can always use a robust Augmentative and Alternative Communication (AAC) device to help find their words. We know that using such a device does never stop or delay children to speak with their mouths. On the contrary it helps, enormously!

    Can playtime still be a blast? Absolutely! In fact, incorporating AAC into play can be a powerful way to boost communication skills, build confidence, and create a truly inclusive play experience. Here’s how to make it happen, with a focus on core words and core scripts for our GLP’s (the building blocks of communication used by everyone). In this video I am using the core word ‘IN’ and ‘MORE’.

    The Magic of Core Words

    Core words are the most frequently used words in everyday communication. They might be verbs like ‘want’, ‘more’, ‘go’, or ‘stop’, or adjectives like ‘happy’, ‘sad’, and ‘hot’. These words are the foundation for building sentences and expressing needs and desires. They’re perfect for children using AAC because they’re simple to understand and use.

    Let’s Play! Here’s How

    1. Choose Your AAC System

    Many options exist! It could be a low-tech picture board with core words, such as the one you see pasted on my cabinet door in the background, or it can be a dedicated AAC app on your tablet. Here I am using the GRID app but I also love using others, such as LAMP Words for Life.

    2. Make it Fun and Functional

    No pressure! Integrate your AAC system seamlessly into your play routine. Here are some ideas:

    • Car/trains: Use core words to describe what the cars are doing: (‘down’, ‘go’, ‘stop’, ‘again’ ‘fast’ ‘slow’).
    • Dress-up: Use core words to choose clothes (‘want’, ‘hat’, ‘shoes’).
    • Tea Party: Use core words to ask for and share (‘more’, ‘juice’, ‘give’).
    • Building Blocks: Use core words to describe what you’re building (‘tall’, ‘big’, ‘house’).
    • Dolls/Stuffed Animals: Use core words to act out scenarios (‘sleep’, ‘eat’, ‘cry’).
    • Arts and Crafts: Use core words to describe colours (‘red’, ‘blue’), actions (‘draw’, ‘paint’), and feelings (‘happy’, ‘sad’).

    If your child is a Gestalt Language Processor you will want to model meaningful, fun scripts instead of single words! As above, but use phrases:

    • Car/trains: Use scripts to describe what the cars are doing: (‘it’s going down’, ‘let’s go’, ‘make it stop’, ‘want it again’, ‘that was fast’, ‘it’s so slow’).
    • Dress-up: Use scripts to choose clothes (‘I’m gonna wear this’ ‘that’s a lovely hat’, ‘let’s choose shoes’).
    • Tea Party: Use scripts to ask for and share (‘I want more’, ‘more juice’, ‘give me this’).
    • Building Blocks: Use scripts to describe what you’re building (‘a tall one’, ‘that’s so big’, ‘it’s a house’).
    • Dolls/Stuffed Animals: Use scripts to act out scenarios (‘it’s time to sleep’, ‘let’s eat’, ‘he’s crying’).
    • Arts and Crafts: Use scripts to describe colours (‘a red crayon’), actions (‘let’s draw’, ‘I’m gonna paint’), and feelings (‘I’m happy’, ‘that’s so sad’).

    3. Model, Model, Model

    This is key! As you play, constantly model using your child’s AAC system.

    • Point to the picture or word or script you’re using.
    • Speak clearly and slowly while pointing.
    • When using core words for either Analytical or Gestalt Language Processors, try using good phrases. For example, instead of just saying ‘juice’, say, ‘you want more juice?’

    4. Make it a Team Effort

    Get everyone involved! Encourage siblings, grandparents, and caregivers to use the AAC system with your child during playtime. The more consistent the approach, the faster your child will learn and feel confident using their voice.

    5. Celebrate Progress, Big and Small!

    Every step counts! Acknowledge and celebrate your child’s efforts, whether it’s reaching for their AAC system or successfully using a core word. This positive reinforcement will keep them motivated.

    Remember

    • Playtime should be fun, not stressful. Don’t force your child to use their AAC system. Let them lead the way and follow their interests.
    • Every child develops at their own pace. Celebrate your child’s unique communication journey.
    • Seek professional help when needed. Your SLT can provide tailored strategies and resources to support your child’s development.

    By incorporating AAC and core words into playtime, you’re not just fostering communication; you’re creating a space for your child to thrive, explore, and build strong connections.

    So, grab those toys, power up your AAC system, and get ready for a playtime adventure filled with fun, connection and, therefore, communication!

    Don’t hesitate to contact me!

    Sonja McGeachie

    Early Intervention Speech and Language Therapist

    Feeding and Dysphagia (Swallowing) Specialist The London Speech and Feeding Practice

    The London Speech and Feeding Practice


    Find a speech and language therapist for your child in London. Are you concerned about your child’s speech, feeding or communication skills and don’t know where to turn? Please contact me and we can discuss how I can help you or visit my services page.

    1
  • ·

    How to model AAC with our minimally speaking students?

    modelling AAC

    How should we start? Should we use prompts? What kind of prompts? hand-over-hand or just pointing? Should we wait, and, if so, how long? Introducing an alternative communication system (AAC) to our child is for many of us a confusing and sometimes scary prospect, but it needn’t be! Let me reassure you and share some tricks of my practice in this area.

    Once we have decided to try for a picture based communication system, I usually start with a paper-based single page with between 48–88 core-words. I choose the number of words depending on where the child is developmentally and also verbally.

    If a child does have a small handful of words already, I might start with the 88-cell board below. If, on the other hand, my student is completely non-speaking and still quite little then I might go for the 48-cell below here or I might have even less cells to start with. Again, sometimes I start with an electronic device in my clinic just to trial and introduce the idea and to see if, or how, a student responds. 

    Below are some samples: a 49-cell board which I made for a child in a nursery setting

    Below a Saltillo WordPower board that can be downloaded from the Saltillo website:

    Example of a slightly more advanced board, again from the Saltillo Website

    And here below one example of a board I made for a specific activity for a child who loves water and sand play:

    It is perfectly possible to be very flexible and create a suitable board for any student, starting with as few as 2–5 cells and working up to over a 100 (very small ones) on a sheet of A4 or A3 paper.

    So once we have a good board for our child, what now? How do we start introducing this into our daily life?

    We can start by showing/pointing to the word GO within a play activity. For example:

    • a car run,
    • or a marble run,
    • or a spinner activity,
    • a wind-up toy,
    • anything that can be stopped and started easily.

    How to start?

    I will talk us through each of the steps using the example for the word ‘GO’.

    First phase

    The first phase is a TEACHING/ LEARNING PHASE. In this phase we do not expect our student to do anything, to copy us or to point to the board. If they do that it is of course a huge bonus and we will celebrate it.

    Our job is to simply MODEL/SHOW/GIVE EXAMPLES of how we can use the board, by steadily and regularly pointing to the chosen word or words. We do so across the day and across settings:

    • play
    • meal time
    • getting dressed/undressed
    • bath time
    • going to the car/shops
    • etc

    Once we can be sure that our student has been submerged and SOAKED in seeing the coreboard being used, say after some 3–4 weeks of using it consistently…

    Second phase

    We can begin to move into the second phase which is the PRACTICE PHASE. By now the student has seen the boards and he or she has seen the word GO (as a example) modelled many times.

    Now we can start to see if we can tempt our student into trying this out for themselves.

    What sort of TEMPTING are we talking about? Take a look at the Prompt Hierarchy below, which shows us what to do to get our student to be independently communicating as soon as possible. 

    The PROMPT HIERARCHY: what sort of prompting should we do, should we expect something from our student or how should we view this stage?

    1.  TEMPT AND PAUSE

    I have the AAC near to the toy and each time the child starts another round of the activity I say clearly ‘GO’ and I point to the picture as do so. I then pause and wait to see what happens. NOTHING? Then…

    1. USE SIGNS AND BODY LANGUAGE

    Next time the child starts another round I might be very animated and do a Makaton sign for GO as I say ‘GO’ and I make a very over point to the picture again. Then I wait. STILL NOTHING? OK then…

    1. OPEN-ENDED QUESTION

    Now I might say ‘GO’ and follow with: ‘OOH I WONDER IF THERE IS A PICTURE TO POINT TO…’

    ‘OH LOOK HERE IS GO!’ I then point to GO.

     STILL NO RESPONSE?

    1. ASK FOR A RESPONSE

    I might say ‘GO’ followed by ‘LOOK! LET’S POINT TO GO HERE ON THE PICTURE.’

    STILL NO RESPONSE? 

    1.  PHYSICAL TOUCH

    Next time I say ‘GO’ I will try and take the student’s hand, help isolate their finger and help him or her to point to the actual picture.

    REMEMBER: Prompting serves a very important function in scaffolding learning for students BUT if we are constantly prompting kids, then we are teaching them to only communicate when someone tells them to. We want our student to become as independent in speaking and using words as possible.

    So once I have done Physical Prompting I will try and phase back down to number 1 where all I need to do is point to the picture or look at the board with the aim that the student will then point to the picture.

    Take away points:

    • Keep the learning phase pressure-free and model without expecting our student to jump in. In other words, let’s model first without expectation. Later we can have a little bit of expectation.
    • After they’ve been exposed to and have been ‘soaked’ in plenty of AAC input, then, YES, we can create an opportunity to help them say or point to the word on their own.
    • We can model BOTH with and without expectation.
    • Only after LOTS of exposure, use the least to most prompting hierarchy and start creating opportunities for a student to become an independent communicator.

    Do get in touch if you have any questions or comments or if you would like some practical help.

    I am always pleased to hear from you.


    Find a speech and language therapist for your child in London. Are you concerned about your child’s speech, feeding or communication skills and don’t know where to turn? Please contact me and we can discuss how I can help you or visit my services page.

    0
  • ·

    Rethinking the PECS Approach

    I want to talk about some concerns of SLTs, parents and increasingly autistic adults who explain to us how this communication method did not really work so well and why.

    What is PECS in a nutshell:

    PECS (Picture Exchange Communication System) is based on the idea of exchanging pictures in return for desired items. For more advanced users, it is used to communicate different functions such as emotions, comments, negations using the exchange of a sentence strip. It was founded on the principles of Applied Behavioural Analysis (ABA).

    How does that look in practice?

    In my experience, having been trained in the approach myself, the overall aim is eventually for the child to spontaneously go and get their picture book (PECS book), open it, look through a range of pages to select the correct picture of what they want to have or say, then go and find their communication partner, and finally place that picture onto the communication partner’s outstretched palm to be rewarded with an item or with a response of some sort. Or the child selects a range of pictures to create a little sentence, such as: ‘the blue fish swims in the sea’, ‘the red bird flies in the sky’ or ‘I see a red bird’ for example. This can be part of a structured table top activity.

    The system follows a series of phases, starting from simple picture exchanges to eventually construction of sentences using symbols. PECS’s aim is to promote communication initiation and reduce frustration for those who struggle with speech.

    So far so good one might say, why not? Before I go into the various concerns, I would want to add my own working experience with PECS, and whilst it is my opinion, I would say I have NEVER seen a working PECS book being used spontaneously!

    My experience

    I have seen attempts of stages 1 and 2 done quite well, in schools, and where people knew that I was coming in “to have a look at how PECS is working with child X”. Yes, in those instances an effort was made of course to try and show me how it worked. I must add that have never been very impressed. I cannot recall it used for any other items than: biscuits/quavers/crisps/ raisins and bubbles/puzzle pieces or spinners.

    If we want to see a child trained to exchange for these items in a structured setting, i.e., the child sits at a little table with the adult sitting opposite enticing the child with one or other item, then yes that can be done successfully. I have seen children exchange 25 pictures with a crisp on it, for said crisp and they might have asked for another 25 of those crisps given half the chance. Yes. Good. But. I have yet to see a child go to their PECS book and go through all the motions that I mentioned above to get a crisp. In school they don’t need to: they know that crisps are only available when the PECS book is being practised. Otherwise, let’s be honest, it’s fruit at 10.30 am!

    So, they don’t get a spontaneous opportunity to ask for highly motivating items as that is not how school works, is it? ‘SIR! Can I have a crisp?’ At 10.02am, in the middle of maths? Didn’t think so… So in reality this does not get practised in my experience.

    A few concerns in no particular order:

    Limited Generalisation

    One issue often raised is the limited generalisation of skills learned through PECS. The structured nature of the program may result in a child only being able to communicate effectively within the specific contexts where they were taught to use the system (as I suggest above: crisps: yes, please let’s do the PECS for it). This limitation can pose challenges when trying to apply communication skills in new or unstructured/spontaneous situations.

    Lack of Spontaneity

    Critics suggest that PECS can sometimes lead to scripted and less spontaneous communication. This is also what I have observed. Since the method is designed to follow a structured progression, there is a concern that individuals might struggle to initiate communication outside of the established framework, potentially hindering their ability to engage in more natural interactions.

    Narrow range of communication functions being practised

    While PECS is quite successful in focusing on requesting and naming items, there are many other important communication functions, such as expressing emotions, asking questions, giving opinions or greetings for instance. We can argue that a communication core board where we have a whole range of different core words available lends itself much better to practising a range of communicative functions.

    The Pictures are movable

    They are attached to the book via Velcro. They are constantly being picked and exchanged and then returned to the book. This means that the pictures tend to be always in different places. This goes against the motor planning that takes place when one is learning a new skill: imagine you want to learn to touch type and the letters always move and are at different places? How can you be quick about finding a letter? You can never get to “automatic” with this type of approach.

    Communication is not taught via behavioural means

    Only if you say “banana” in the way that I dictate that you should will you get a piece of banana. Who does that? Nobody. Typically, child points to the counter where there is a banana and says: ‘ba’ or ‘ana’ and mother/carer will look over there and say ‘oh banana! You want a banana? Ok there you go have a piece.’ Or something like it. Mother will not say: ‘SAY BANANA or else you won’t get it.’ Child hears mum saying ‘Banana’ each time and with time will point and say ‘banana’ or ‘I want-a-nana’ or something. This is how communication is learned: through the adult modelling it cheerfully all day long and the child hearing it and then gradually copying it.

    One other gripe I personally have but I am reliably informed by all my parents that they share this about PECS:

    IT IS SO LABOUR INTENSIVE!

    There are 10, 50, 100’s of little pictures that first of all need laminating… then velcroing, then finding and replacing. As I said above, it’s a constant moveable feast for one, but also you LOSE them. Yep. You want to find the picture for “trampoline”. ‘Where is it? I saw it yesterday… We had it outside when we practised you asking for the trampoline. I am sure we put it back? Where is it??? Ok. We need to print off a new one.’

    It is also labour intensive for the first stage where you need to have TWO adults to ease the exchange (pick up and release of picture into the communication partner’s hand). Who has two adults available for what can be weeks until the child is able to pick up and release by themselves?

    YEP. So it’s really not for me you can tell! I much prefer Core boards (see my previous post on using one) or electronic speech generating AAC devices like GRID, or LAMP or TOUCHCHAT. These are all great to use and there is good support out there for introducing these.

    Finding a Balance

    While the concerns surrounding the PECS approach are valid, it’s fair to note that the method also has some merits. There is anecdotal evidence of many individuals who have successfully improved their communication skills and quality of life through PECS. But, finding a balance between using PECS as a stepping stone and ensuring the development of more comprehensive and SPONTANEOUS communication is key.

    As educators and therapists, we need to extend the focus beyond requesting and labelling by incorporating symbols that represent emotions, actions, and more complex ideas. This expansion encourages a broader range of communication functions. When the time is right, gradually transitioning from PECS to more advanced communication methods such as Core boards or electronic AAC tools and speech-generating devices is the way forward.

    We want to value all communication equally and our approach ought to be playful and child-led and to focus on intrinsic motivation instead of extrinsic rewards and reinforcers.

    If you have any questions or if you are looking for a therapist who endorses play-based and child-led therapy approaches, please do reach out.


    Find a speech and language therapist for your child in London. Are you concerned about your child’s speech, feeding or communication skills and don’t know where to turn? Please contact me and we can discuss how I can help you or visit my services page.

    0
  • Quick Overview Of How To Implement Those Early Hanen Speech And Language Strategies

    Quick Overview Of How To Implement Those Early Hanen Speech And Language Strategies

    First up try and get down at eye level or Face-to-Face with your child

    Try to sit so that your child can see you easily, i. e. your child does not have to look up to make eye contact with you. We call that Face to Face: try and sit opposite your child. This makes it easier for you to see facial expressions and therefore pick up nonverbal /pre-verbal communication. Now you can connect and share the moment with your child.

    OWL (Observe, Wait and Listen)

    Never skip this step as it prepares us for what happens next !

    Observe

    First, try and simply watch your child quietly and listen and observe what he/she says or does; you need to know what your little one is interested in. For example with this toy (pictured below) we could observe that your child loves the actual spinning of the marble, perhaps more than that noisy click-clacking down the run. Or perhaps he loves collecting the marble at the end and feeling it in his hand.

    You could start off with showing once how the marble goes down and say:“ look it goes round and round !” Then hold back and observe, without speaking, so that your child has time to explore the toy.

    Wait

    Just sit and avoid telling or showing your child what he or she could do with the toy. This gives your child an opportunity to explore and experiment.

    Listen

    Listen to what your child says, or look at your child’s non-verbal communication without interrupting. Your child will now feel and know that you are really present and that what they have to say is important. It’s best to avoid questions like, “What are you doing or “What’s this?” as that might be a lot of pressure when they don’t know what to say about that yet.

    Respond immediately by showing interest

    Once you have all the information from OWLing you can respond in the right way, for example: if she catches the marble at the end of the run and looks up with a smile or a sound you could respond with: you’ve got it! One marble in your hand! Nice playing!

    Now how to join in the play:

    First you can copy what your child is doing

    If your child puts the first marble at the top of the run you can take a turn and do exactly the same once his marble is done. Ideally you might have another marble run, perhaps a similar one, it does not have to be exactly the same! Once your child has put the first marble in you can do the exact same with your own marble on your run. Your child is likely to look at what you are doing and you might well see a smile on their face or perhaps she might say: look at mine!

    Next you can build on that

    You can respond with simple comments like: “Wow! Yes I am looking at yours now! It’s spinning on the red one lots! I love the noise!” Now wait once more to see what your child says or does.

    To summarise

    We are signalling to our child that we are really interested in what they are doing and saying so we can “collect” our child, i.e. bring him/her back into a joint interaction.

    Important

    We want to try and not direct our child but respond with interest and fun! This creates a lovely stage for interaction and joint play! And this leads in turn to practising conversation and ever more opportunities for great speech and language skills to emerge.

    Great activities we use in Speech and Language Therapy:

    • Any cause and effect toys like this Marble Run
    • Creative activities, such as mark making with crayons
    • Train tracks (building and running the trains)

    Find a speech and language therapist for your child in London. Are you concerned about your child’s speech, feeding or communication skills and don’t know where to turn? Please contact me and we can discuss how I can help you or visit my services page.

  • · ·

    Hard munchables: Chewing through the weaning journey

    As a Speech and Language Therapist with a specialism in paediatric feeding, I’m constantly looking for ways to support families in developing their little ones’ oral motor skills and fostering a positive relationship with food. While Baby-Led Weaning (BLW) has revolutionised how many families introduce solids, (see my previous blog in July 25) a concept that often sparks discussion and curiosity is the use of ‘hard munchables.’

    What are hard munchables?

    The term ‘hard munchables’ refers to specific types of firm non-digestible food items that are offered to babies for oral exploration and skill development, not for nutrition. These are typically foods that babies cannot bite off or swallow in large pieces due to their texture, but which provide resistance for chewing practice.

    The phrase was coined by Marsha Dunn Klein, M.Ed., OTR/L, Occupational Therapist and feeding therapist. Well known for her work in paediatric feeding she introduced and advocated for the concept of hard munchables as part of a therapeutic feeding approach, particularly for infants learning to manage textures and develop crucial oral motor skills.

    Common examples of hard munchables include:

    • Large, raw carrot sticks: Too hard to bite through, but great for gnawing.
    • Celery sticks: Like carrots, offering firm resistance.
    • Large, raw apple slices (peeled chunks): A firm, slightly sweet option.
    • A firm, uncut pear core: With the seeds removed.
    • Dried mango cheeks (hard, unsweetened varieties): These offer a fibrous texture.
    • A large, fully cooked but firm piece of meat (like a steak bone with some meat attached): The meat provides flavour and a bit of shreddable texture, while the bone is for gnawing.
    • Hard crusts of bread or breadsticks (very firm, without soft inner crumb): These can soften slightly with saliva but offer significant resistance.
    Image by Freepik

    It’s crucial to emphasise that hard munchables are not for consumption or nutrition. They are tools for oral motor development and should always be offered under strict, active supervision.

    How do hard munchables fit into weaning?

    While weaning (traditional or Baby-Led Weaning) introduces solid foods that a baby can eventually bite and swallow, hard munchables are complementary to the weaning phase. They enhance that phase by helping a child to develop hand dexterity, hand to mouth movement, and oral development.

    It’s important to differentiate: Weaning provides the digestible food for eating, while hard munchables provide the tool for skill practice. They are not substitutes for each other but can be used together under careful guidance.

    Pros and cons from a speech therapy perspective

    As an SLT, I see both the potential benefits and the necessary precautions when incorporating hard munchables.

    Pros:

    • Enhanced oral motor development: Hard munchables provide excellent resistance training for the jaw, helping to develop the strength, endurance, and coordination needed for efficient chewing. This is foundational for moving beyond purées and very soft textures.
    • Promotes lateralisation of the tongue: The act of moving the hard item from side to side in the mouth encourages the tongue to move independently of the jaw, a crucial skill for managing food and for speech sound production.
    • Preparation for more complex textures: By strengthening the oral musculature and refining chewing patterns, hard munchables can help babies transition more smoothly to lumpy and mixed textures.
    • Sensory exploration: They offer rich sensory input (tactile, proprioceptive) that can be beneficial for oral mapping and awareness, especially for babies who might be orally sensitive.

    Cons:

    • Choking risk: While the intention is for the baby not to bite off pieces, there is always a risk. Small pieces can break off, or a baby might accidentally bite off a larger chunk than he or she can manage. Active, vigilant supervision is non-negotiable.
    • Not a replacement for digestible solids: It’s vital to remember that hard munchables are for practice, not nutrition. They should complement, not replace, the introduction of varied, digestible solid foods.
    • Not suitable for all babies: Babies with certain developmental delays, oral motor deficits, or medical conditions might not be appropriate candidates for hard munchables without highly specialised guidance. For instance, babies with an exaggerated gag reflex might find them overwhelming.

    Key Considerations for Parents

    Here are my top recommendations:

    1. Consult with a professional: Always discuss this with your Paediatric Feeding SLT first before you introduce hard munchables. We can assess your baby’s individual readiness and guide you on safe practices.
    2. Strict supervision: Never leave your baby unsupervised with a hard munchable, even for a second. Your full attention is required.
    3. Appropriate size: Ensure the item is large enough that the baby cannot fit the whole thing in their mouth. It should extend well beyond their fist.
    4. No biting off: The goal is gnawing and scraping, not biting off pieces. If your baby is consistently breaking off chunks, stop using them.
    5. Focus on skill, not consumption: Reiterate to yourself that this is for practice, not for eating.

    In conclusion, hard munchables, when used appropriately and under guidance, can be a very valuable tool to support oral motor development during the weaning journey. However, always be safe and consult with a specialist to ensure your little one develops his or her feeding skills effectively and joyfully.

    Sonja McGeachie

    Highly Specialist Speech and Language Therapist

    Owner of The London Speech and Feeding Practice.


    Health Professions Council registered
    Royal College of Speech & Language Therapists Member
    Member of ASLTIP

    Find a speech and language therapist for your child in London. Are you concerned about your child’s speech, feeding or communication skills and don’t know where to turn? Please contact me and we can discuss how I can help you or visit my services page.


    References:

    Rapley, G., & Murkett, T. (2008). Baby-Led Weaning: The Essential Guide to Introducing Solid Foods. Vermilion.

    Morris, S. E., & Klein, M. D. (2000). Pre-feeding skills: A comprehensive resource for feeding development. Pro-Ed.

    1